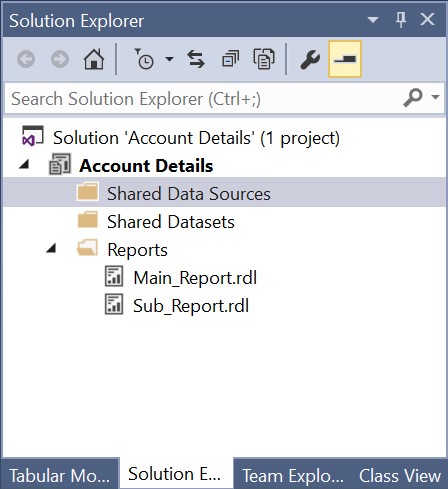
This article will go into detail on how to create a report using SSRS which will run for one or more selected records.
Firstly you should create two reports:
- Main Report
- Sub Report
You can call these what ever you like.
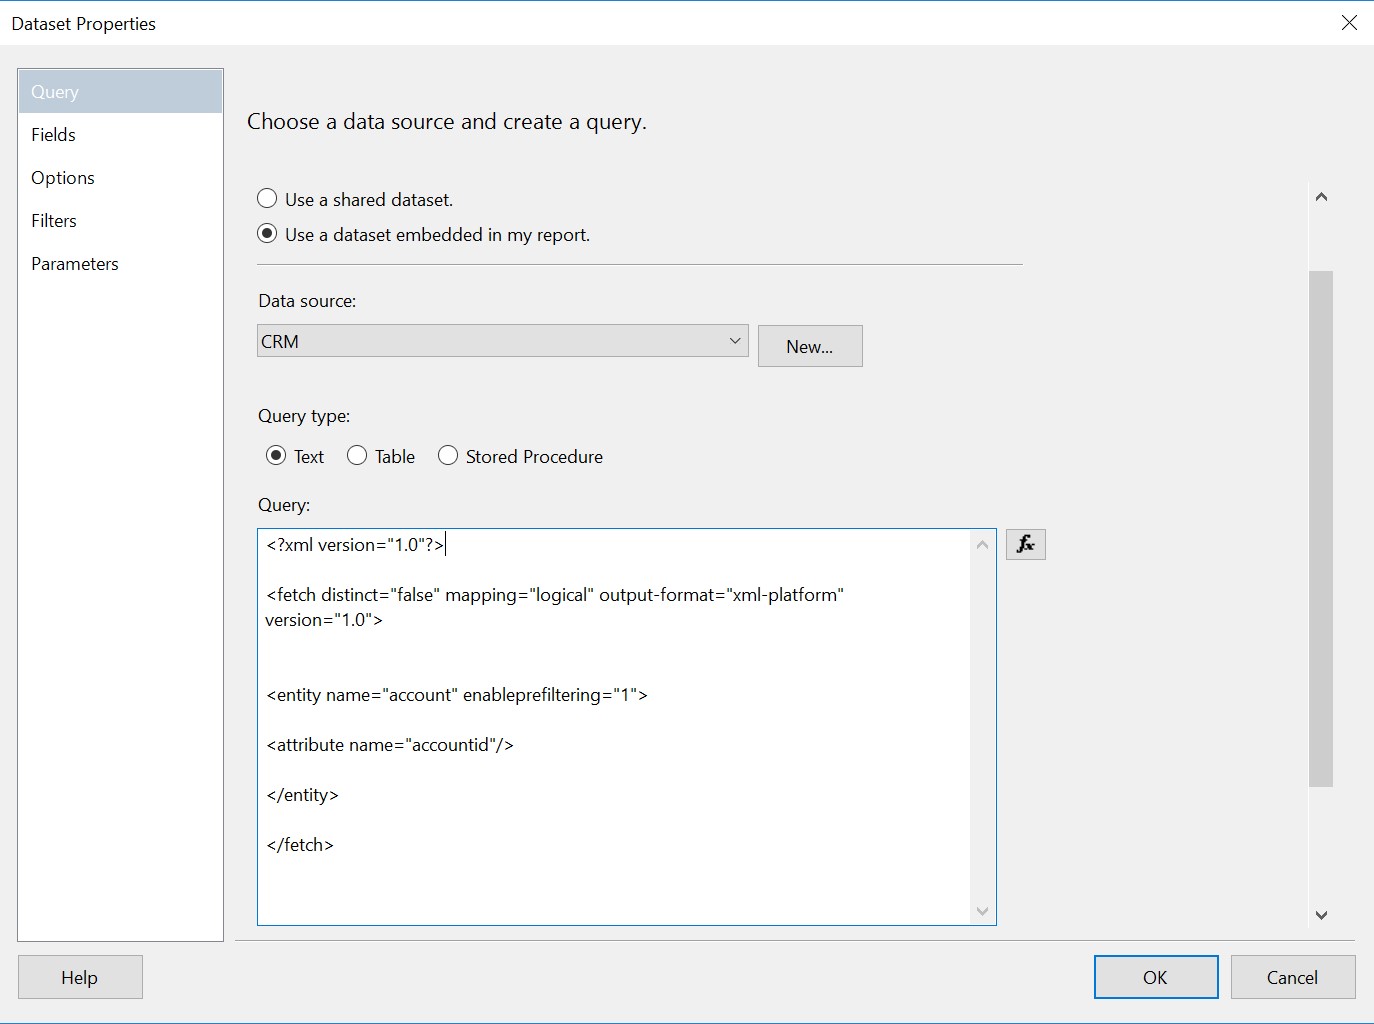
Within the Main Report you should create a Dataset. The Dataset should be based on what your report will be filtering on e.g. If you plan to run this report on Opportunities then you should change the FetchXML query to point at the entity ‘Opportunity‘ and return the attribute ‘opportunityid‘. But in this case I wish to run this report from the Account entity. The rest of the query should remain the same as below.
<?xml version="1.0"?>
<fetch distinct="false" mapping="logical" output-format="xml-platform" version="1.0">
<entity name="account" enableprefiltering="1">
<attribute name="accountid"/>
</entity>
</fetch>
You then copy and paste the Query into the Dataset
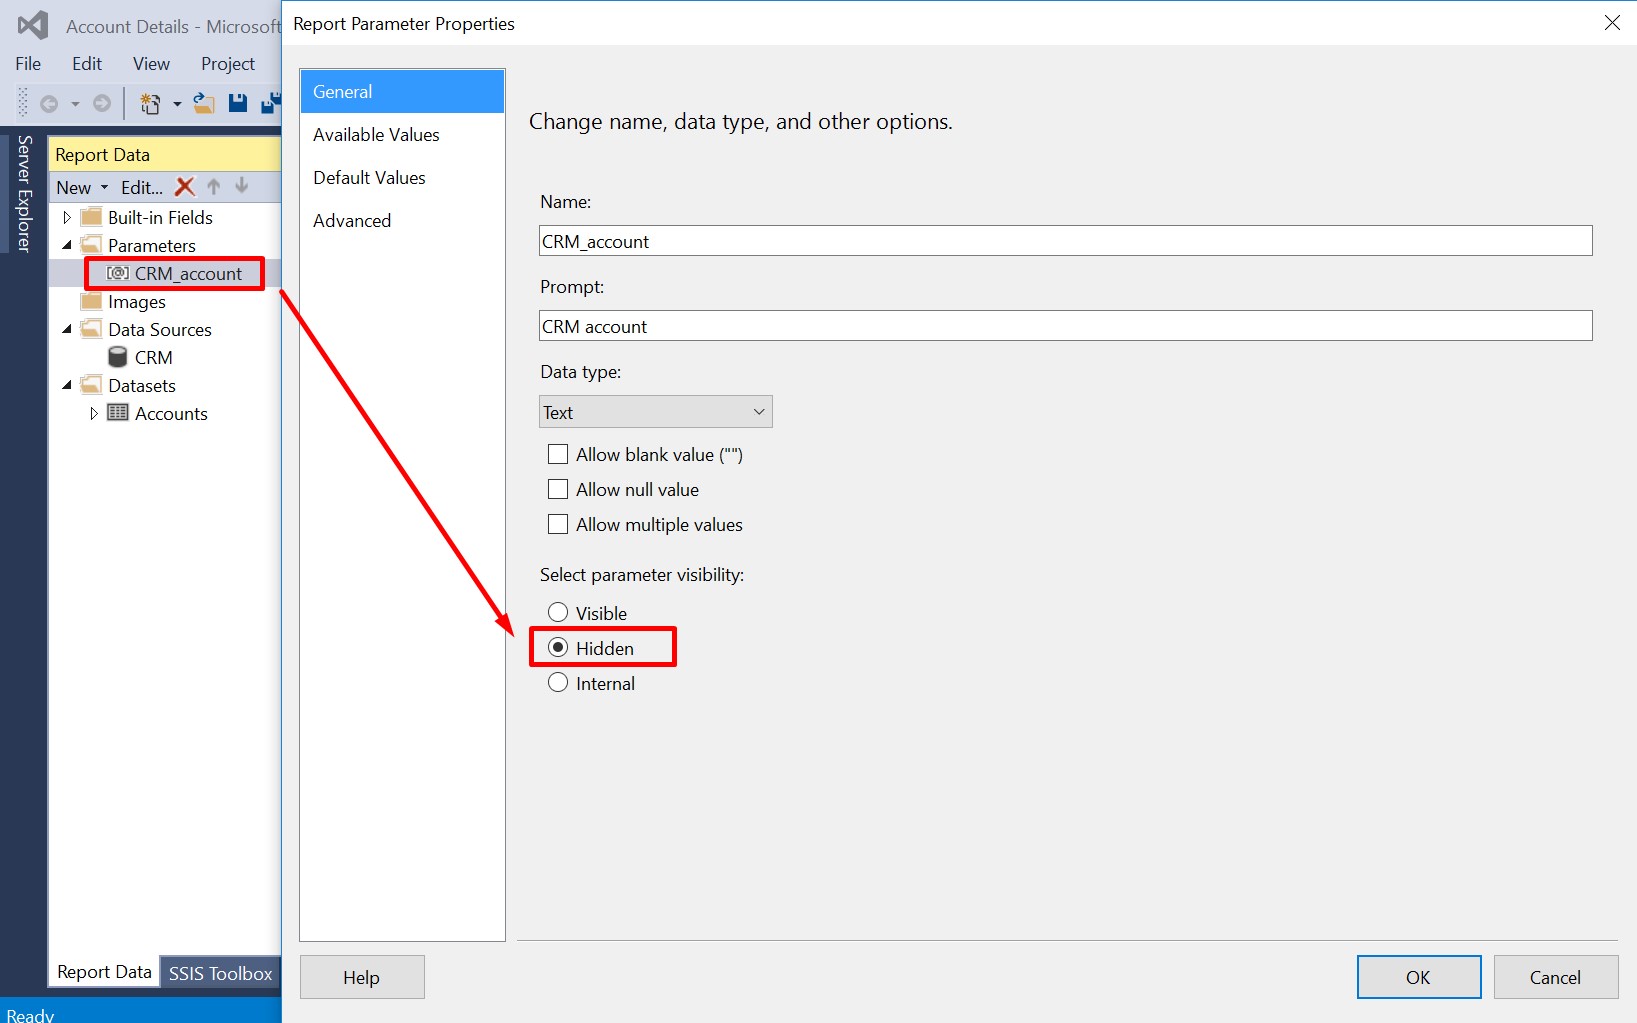
This then should automatically create the CRM_account Parameter for you. Please make sure that the Parameter is hidden as the user does not need to see it.
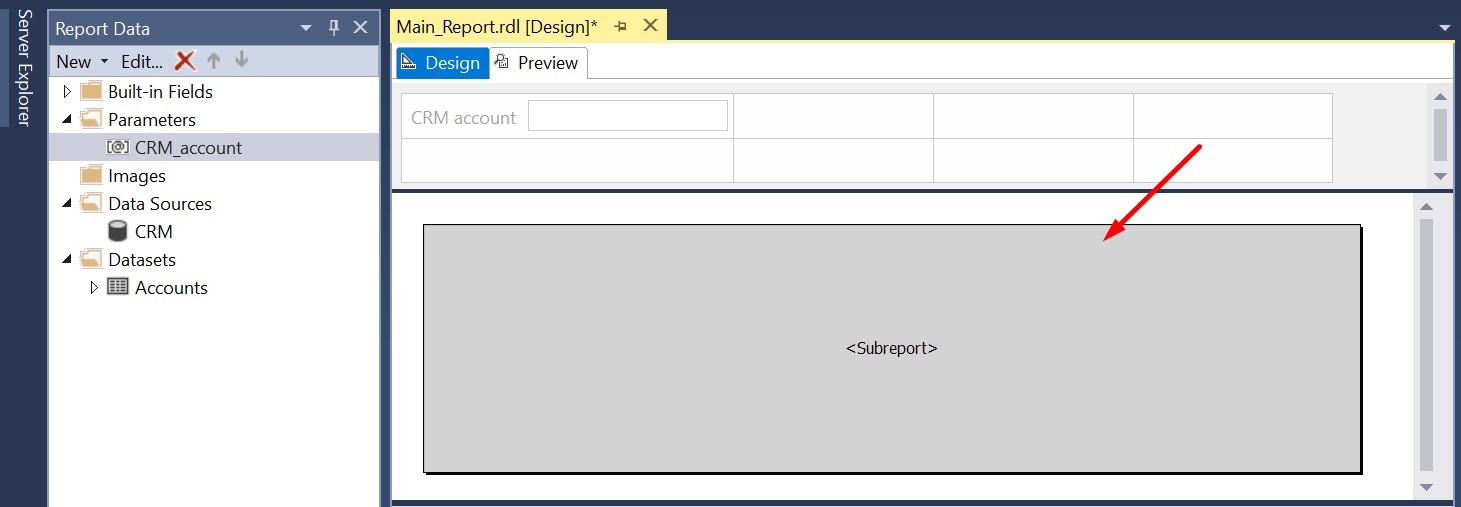
Next, within the Report you should add a new table and right click into one of the data rows. You should then go an insert a new Subreport.
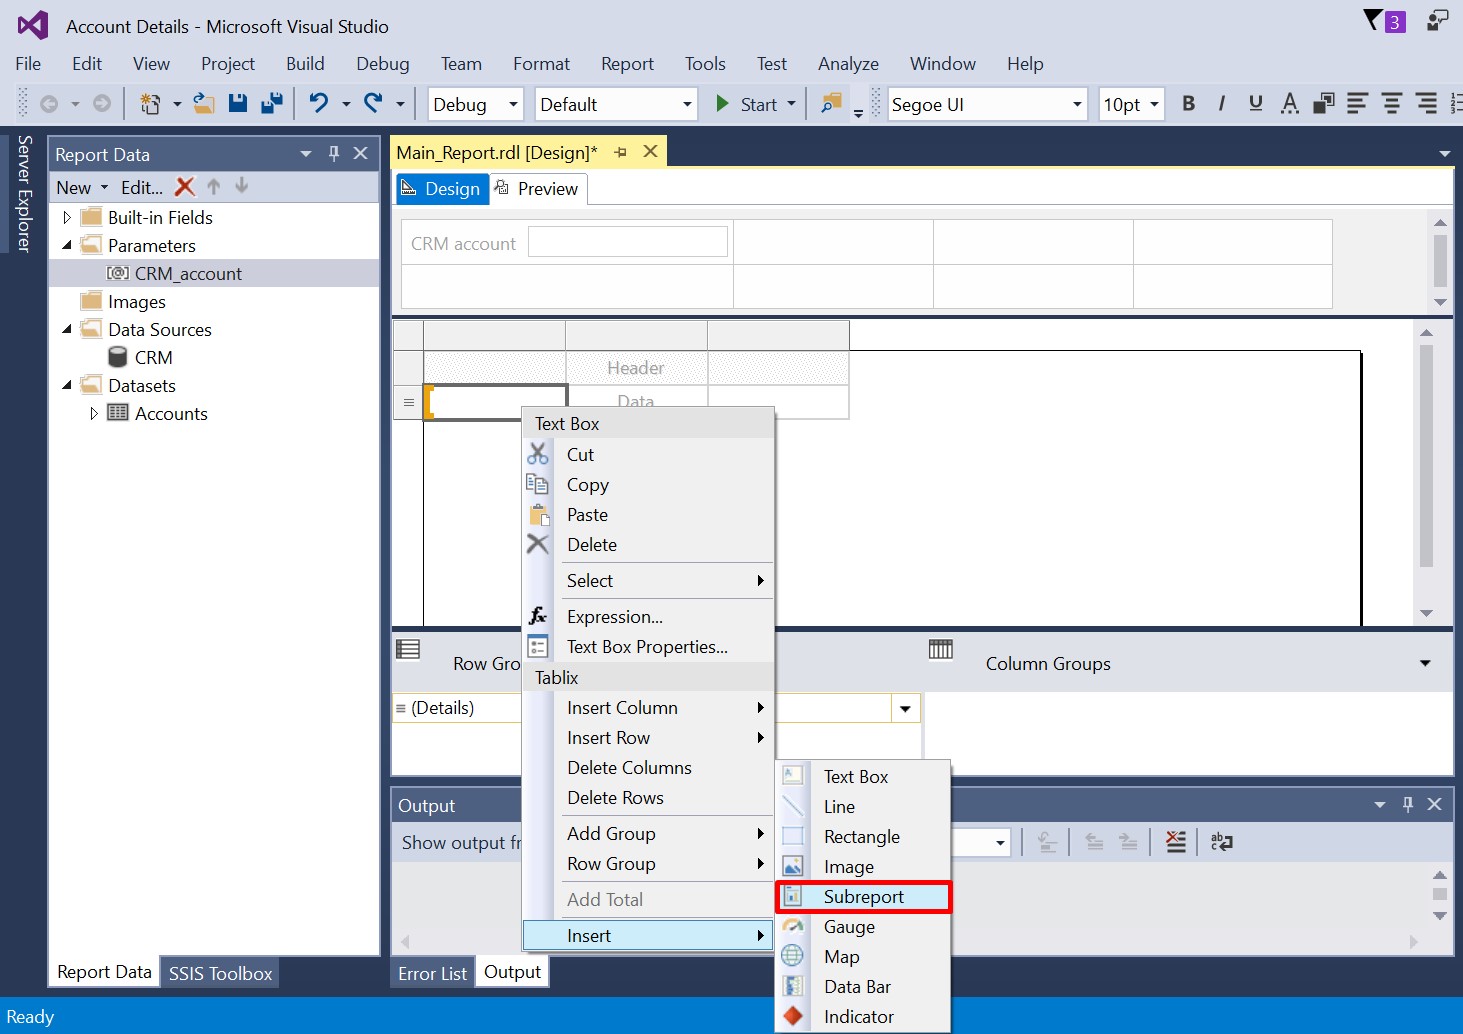
Then please go ahead and delete all of the other columns and rows until you are only left with the Subreport cell. Then stretch the cell so that it covers all the white space of the Main Report.
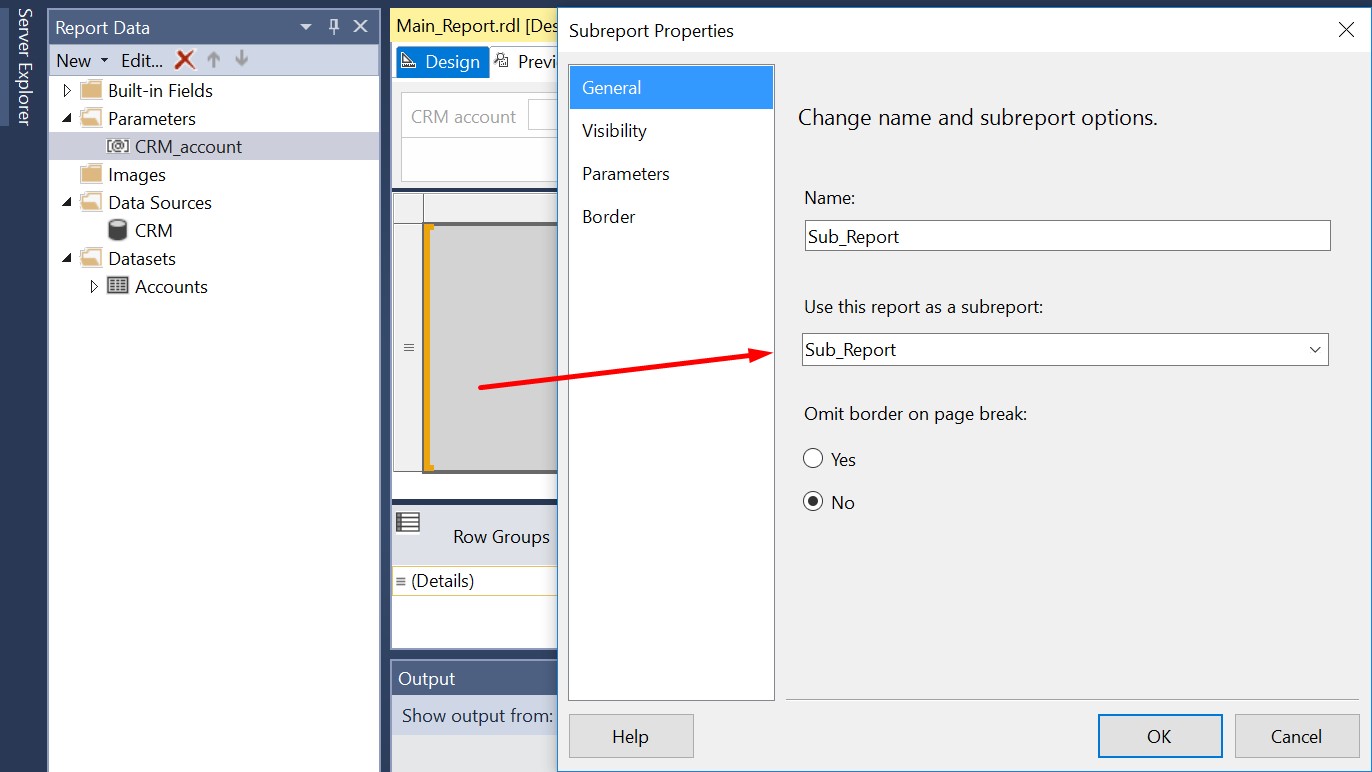
Right click on the Sub Report cell and go to Subreport Properties. You should then select your Sub Report from the drop down. This will point the Main Report to your Sub Report.
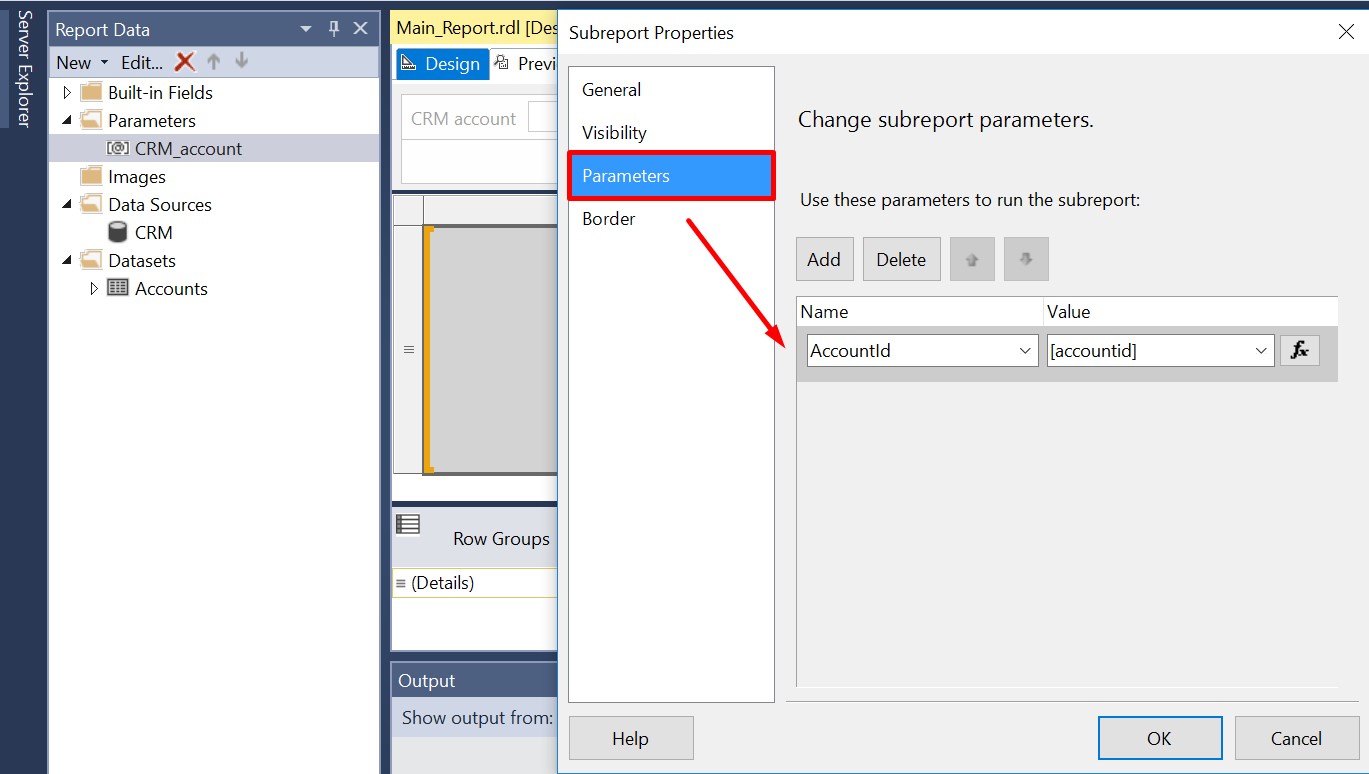
Now click on the Parameters Tab and add new. Within the Value column, this should be your primary id field. Using the same analogy as earlier. If you plan to run this report on Opportunities then you should change the Value to [opportunityid]. But in this case I wish to run this report from the Account entity, so my Value will be [accountid].
As for the Name column, please give it a suitable name similar to your Value Column. In this case I called it AccountId. This name will come into play later.
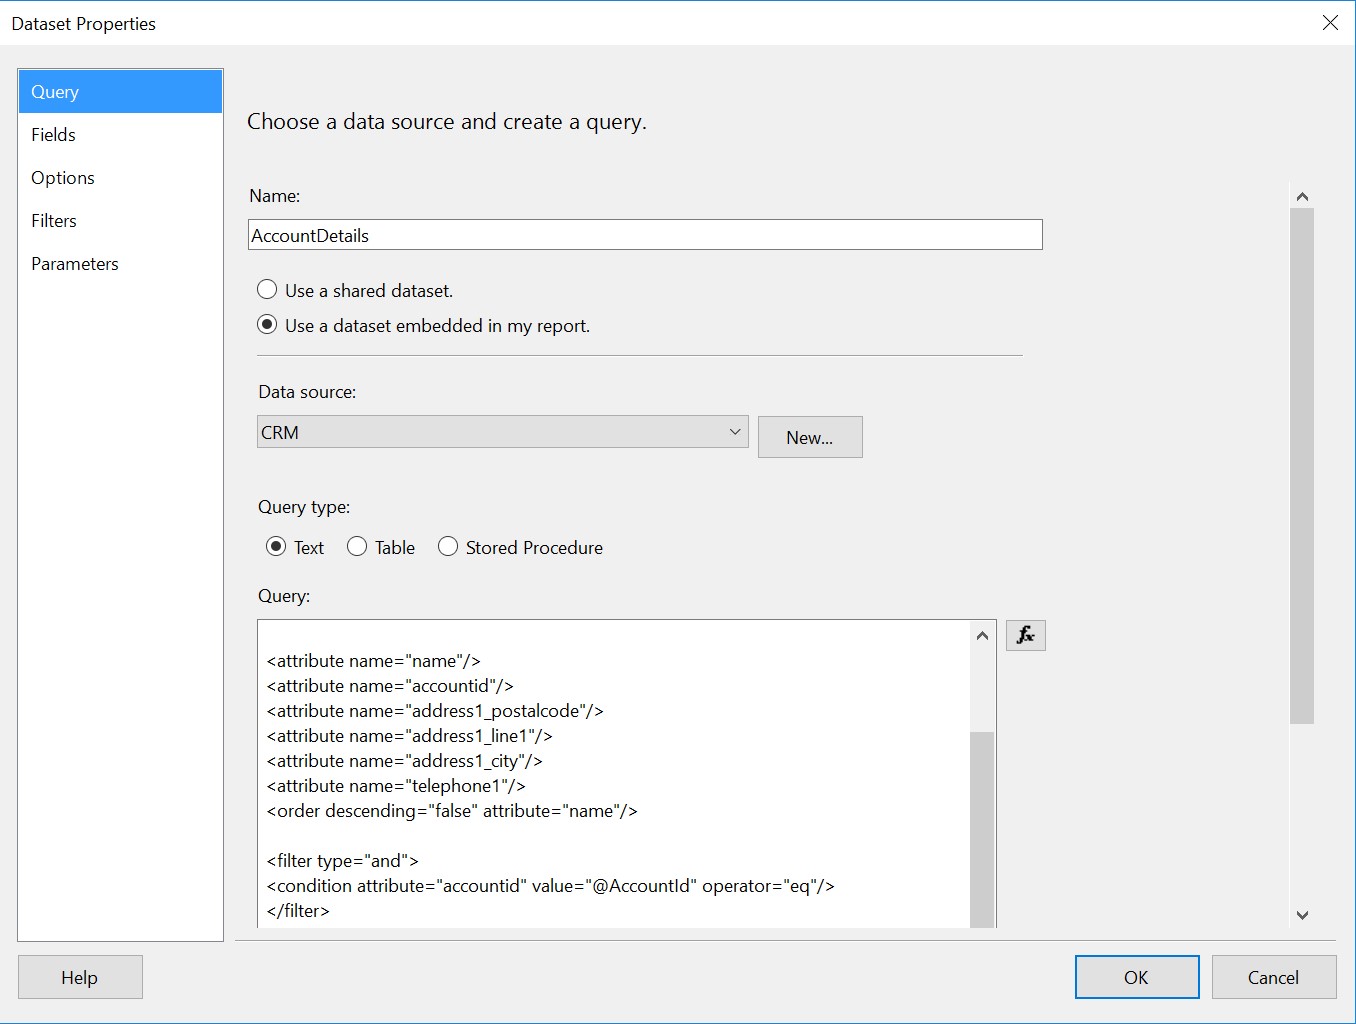
Now please navigate to your Sub Report and create a new Dataset. For my report I wish to bring back some Account details. You will change this Query to suite your own requirements.
<?xml version="1.0"?>
<fetch distinct="false" mapping="logical" output-format="xml-platform" version="1.0">
<entity name="account">
<attribute name="name"/>
<attribute name="accountid"/>
<attribute name="address1_postalcode"/>
<attribute name="address1_line1"/>
<attribute name="address1_city"/>
<attribute name="telephone1"/>
<order descending="false" attribute="name"/>
<filter type="and">
<condition attribute="accountid" value="@AccountId" operator="eq"/>
</filter>
</entity>
</fetch>
Within this query the most important part is the filter.
<filter type="and">
<condition attribute="accountid" value="@AccountId" operator="eq"/>
</filter>
As you can see I have added the Parameter @AccountId. This parameter should be named the same as our Subreport parameter Name Column as I showed earlier:
Once this is done. Please copy and paste the query into the dataset.
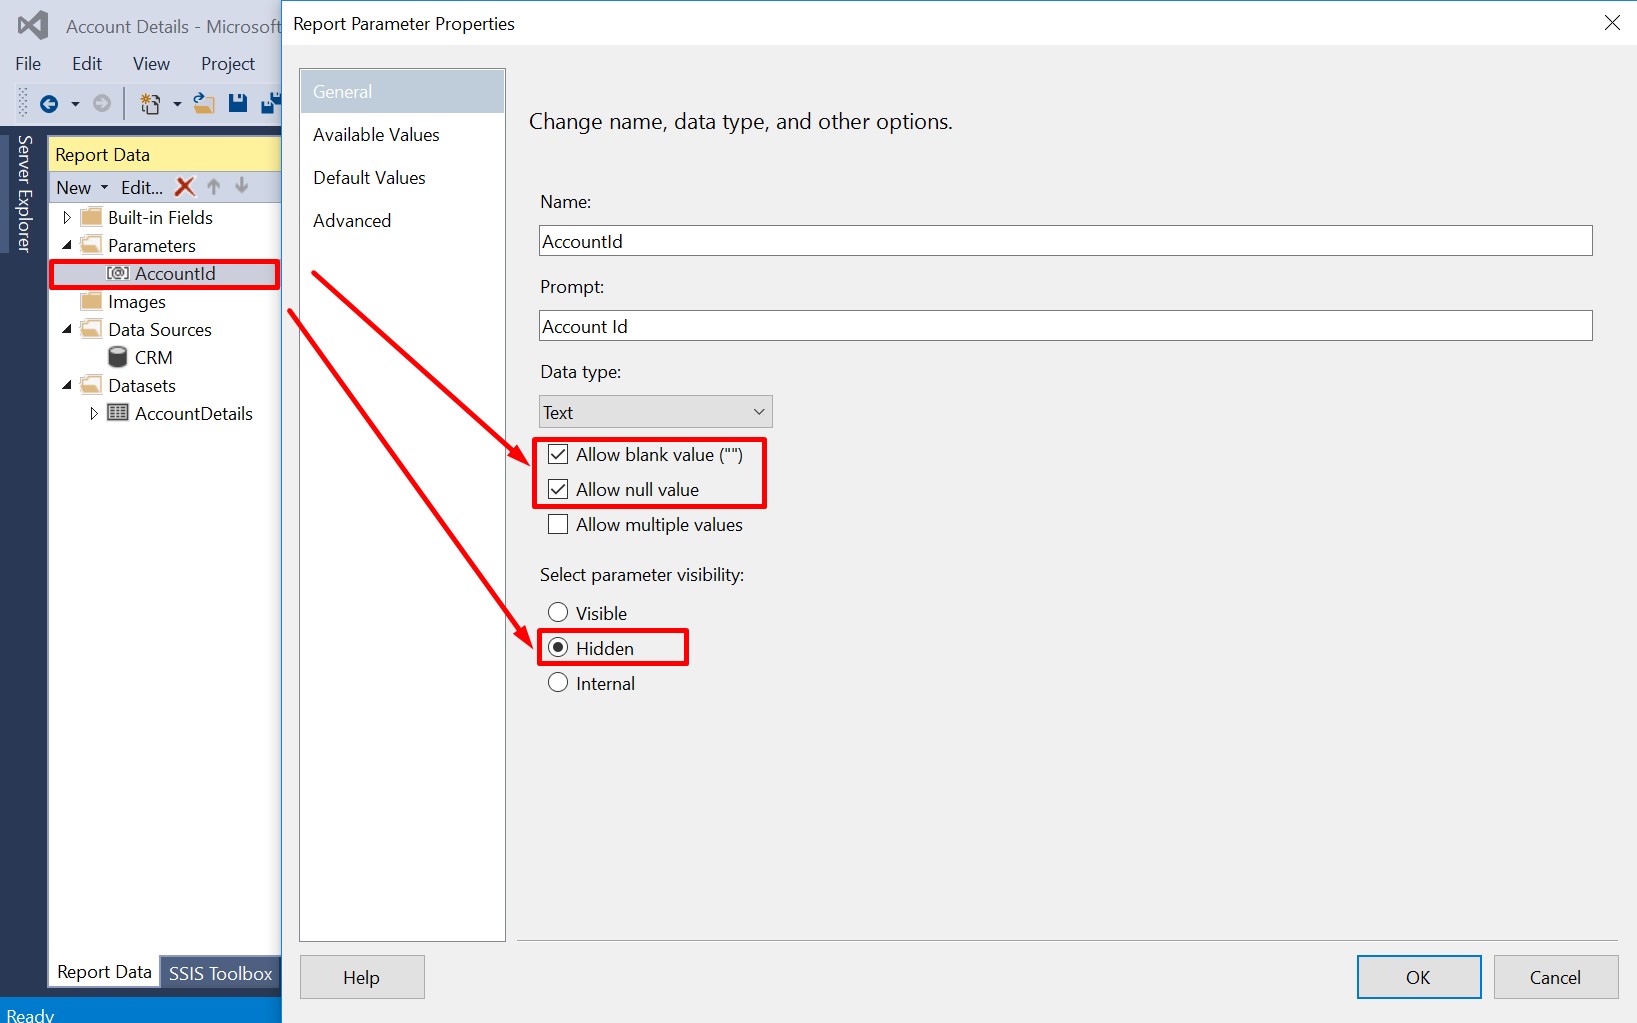
This would of created a new Parameter within the Sub Report. In this case it was called AccountId. Please make sure that Allow blank and null value boxes are ticked and that it is hidden.
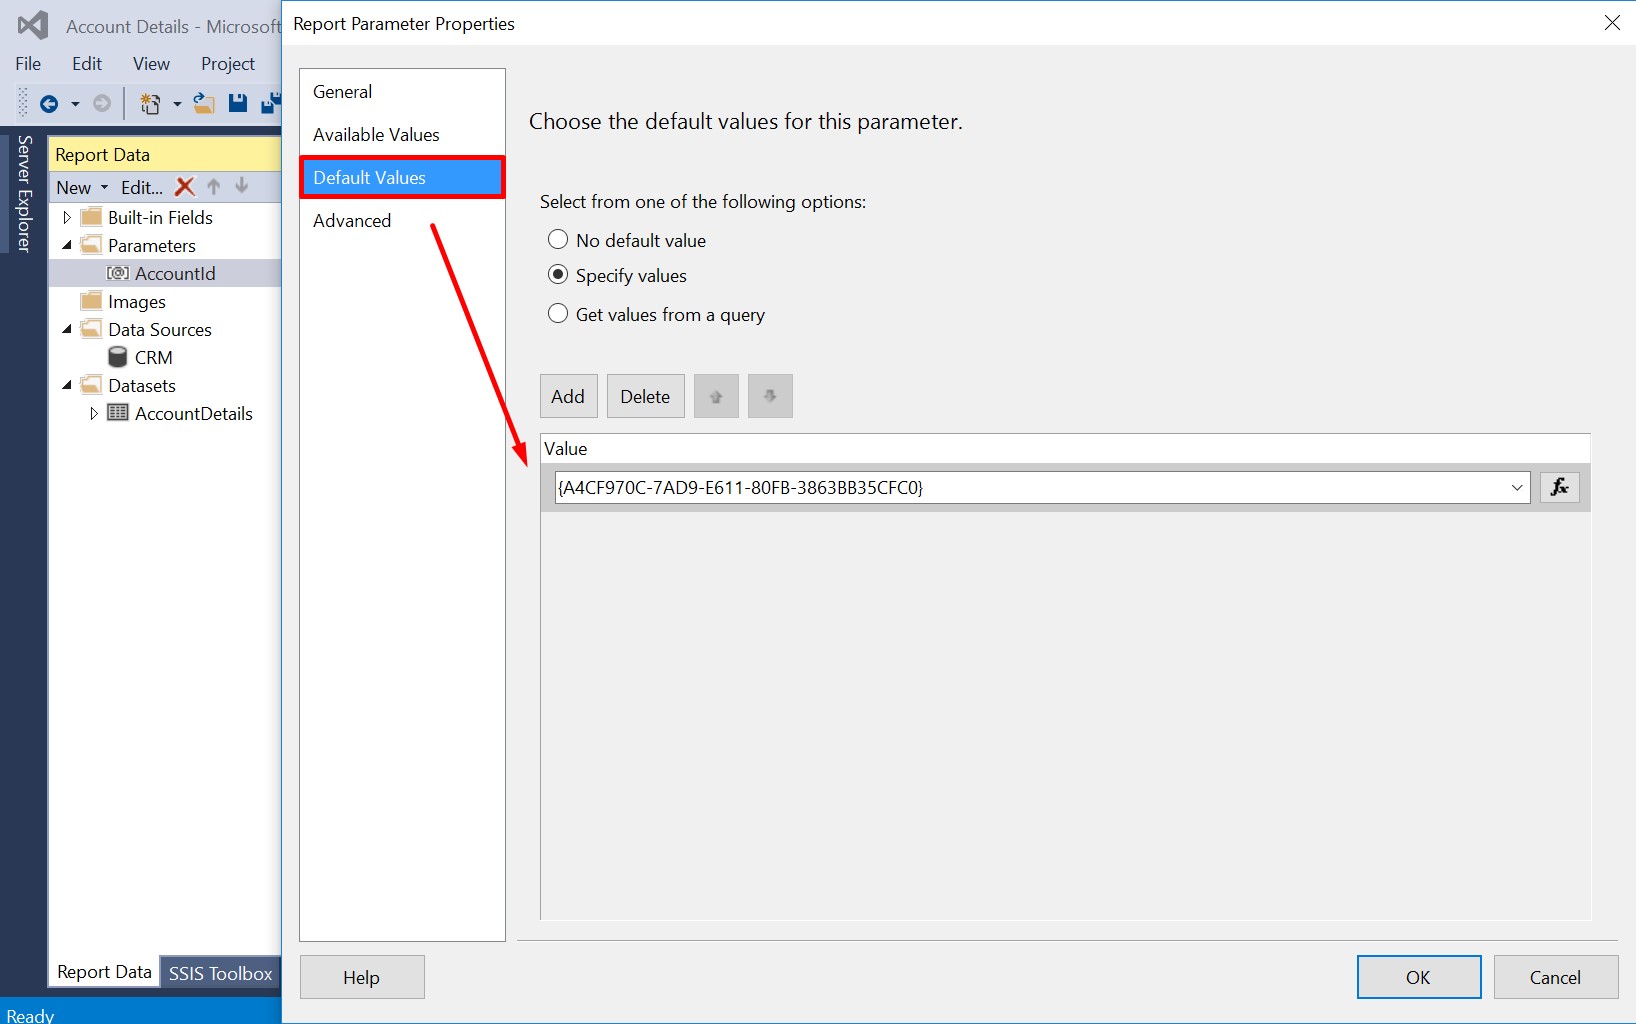
Next, click on the ‘Default Values’ Tab and check the ‘Specify Values’ box. Next you should copy and paste a GUID value within this area. It doesn’t matter if its a working GUID or not, but as long as its in the correct format. The best thing to do here would be to gather a GUID value in your system which you are willing to test, then copy and paste it in here. When you go ahead a preview your Sub Report later it will run against what ever GUID is entered in here.
GUID Example: {223C215A-2CC5-E711-A84F-00224800476E}
Now head back to your Sub Report and add the fields you wish to display on your report.

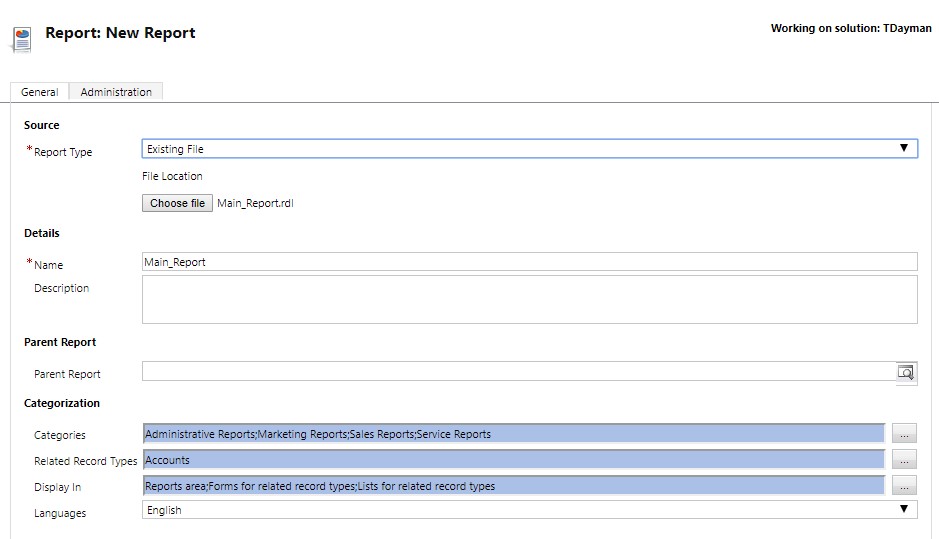
Once you are happy with your report, you will need to add it to CRM. Go to one of your Solutions and add a new report.
You will then need to navigate to your Main Report .rdl file. Usually its in your projects folder. In this case its within this directory:
C:\Users\tdayman\Documents\Visual Studio 2015\Projects\Account Details\Account Details\bin\Debug
Choose the Main Report and copy the details as I have shown below. In the ‘Related Record Types’, this will depend on which entity you are running this report on.
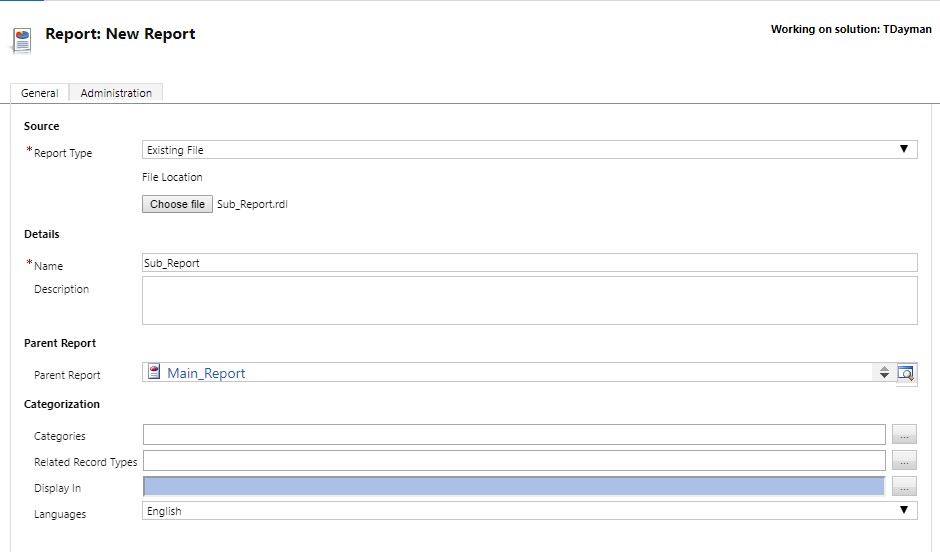
Once you are done with the Main Report, you can go ahead and add the Sub Report as well. Make sure that the details are the same as below.
As you can see below, the Parent Report is already been pre-populated for us. This is because the Main Report has already been uploaded into CRM and detects that this is a Subreport.
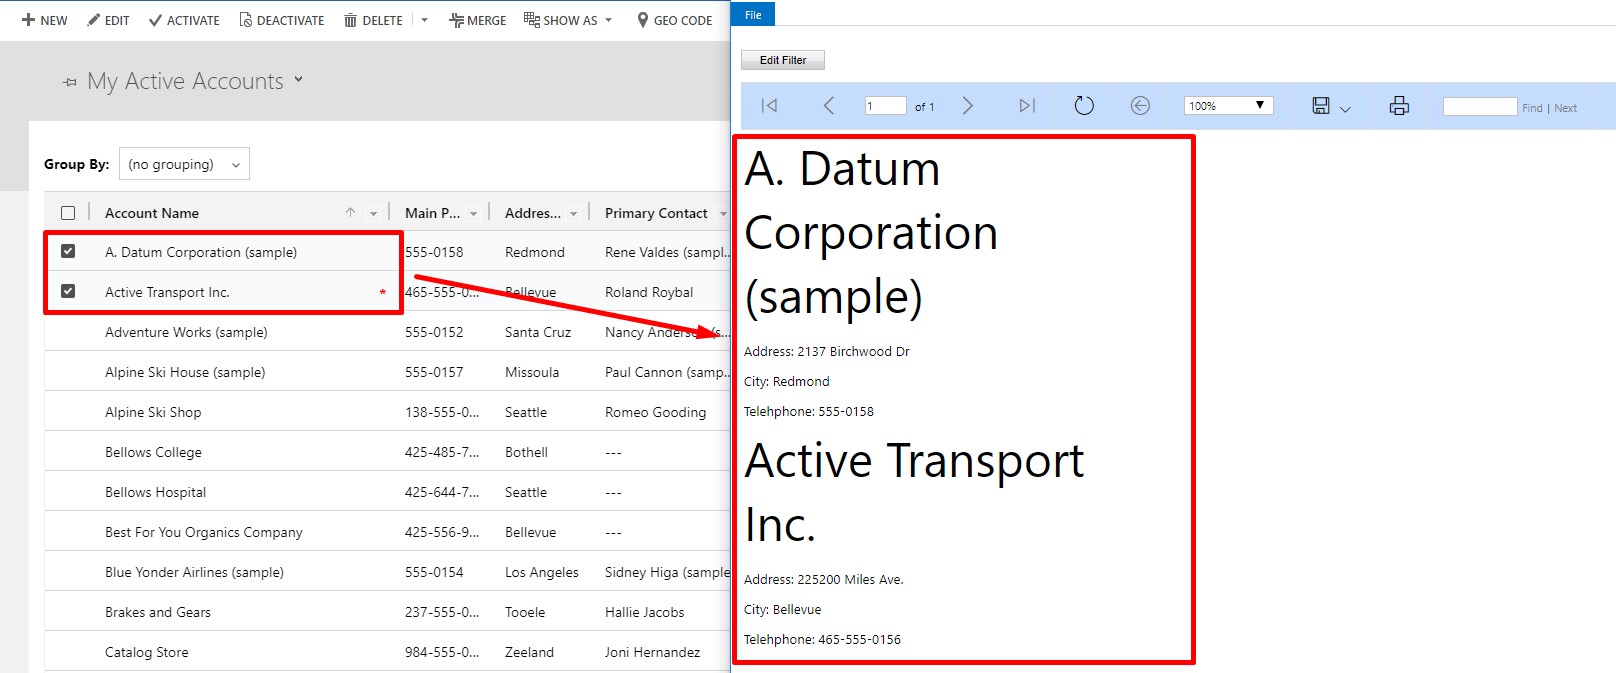
Now we can go an run our report. Please navigate to which entity you have pointed your report at and select a record. You should be able to see your new Report in the list when you go to click the ‘Run Report’ drop down.
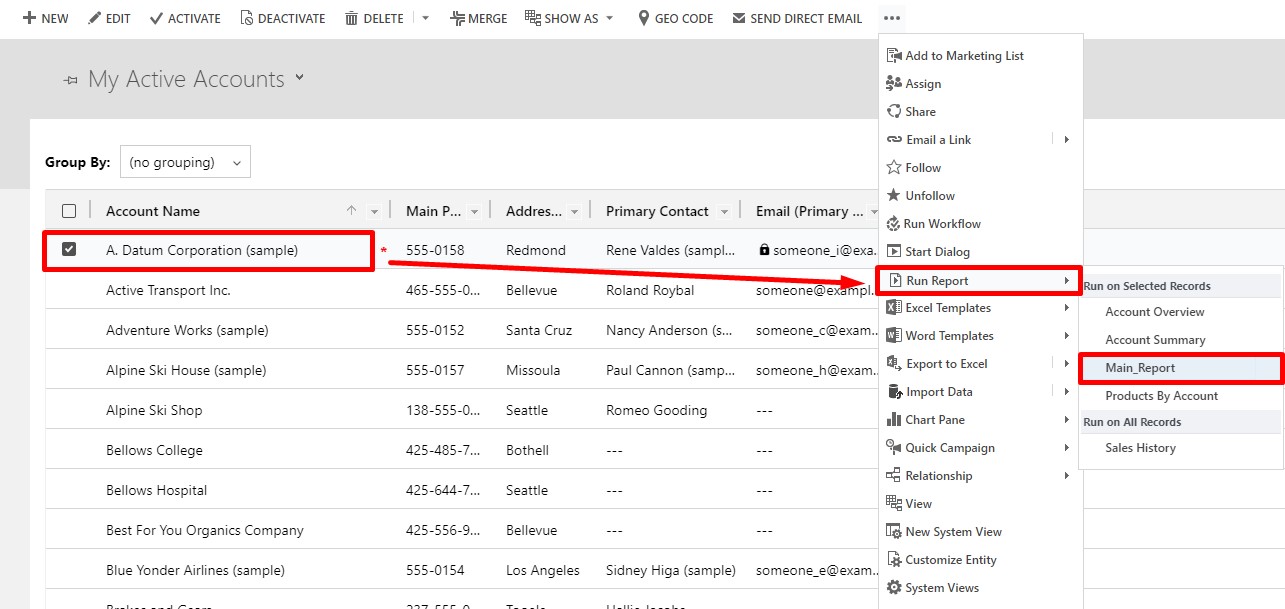
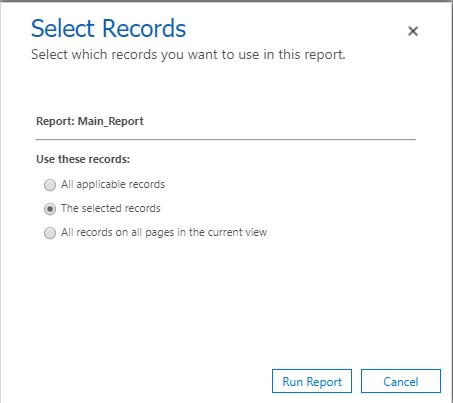
You should tick the ‘The selected records’ box, as you are only planning to run this report per record.
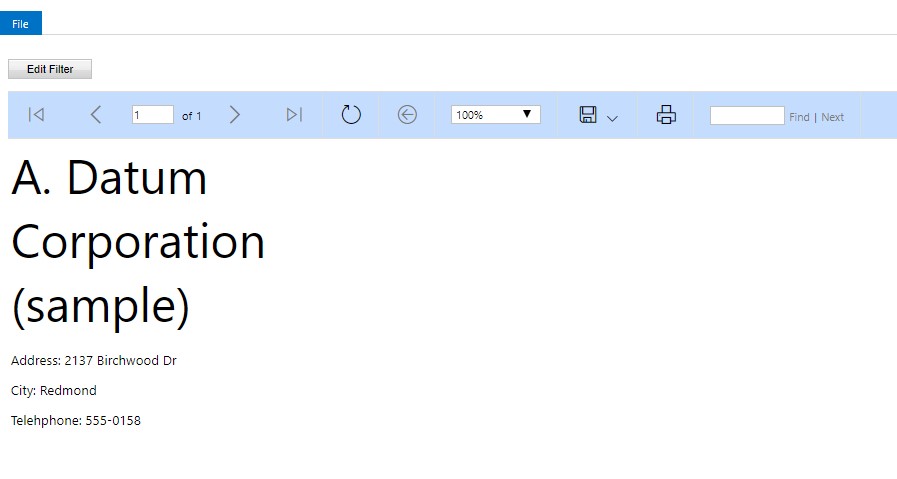
As you can see it has only returned the 1 record.
You can also run this on more than 1 record as well.
This is one of the more requested requirements which usually comes up, so hopefully this has helped you.
Excellent post. If you need to build useful reports from Dynamics CRM this is fundamental knowledge. If only Microsoft could explain this so clearly …
Thanks Mark!
Hi
I’m getting subreport could not be shown error in main report preview.
How to fix this?
Hi sai,
Its been a while since I have looked at this. Have you tried this – http://www.sqlandssrssolutions.com/2013/10/subreport-could-not-be-shown-in-ssrs.html#:~:text=Error%20Subreport%20could%20not%20be%20shown%20in%20SSRS%20Issue%20Reason,with%20Main%20Report%20Parameters%20Name.&text=1%2DThe%20Name%20data%20type,should%20be%20same%20as%20SubReport.
same problem
Hard for me to say what the problem could be. Usually its when you are doing an expression which is invalid somewhere in your report. I havent done SSRS reports in a little while so its hard for me to remember.