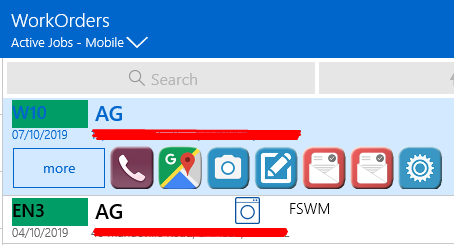
This post will show you how you can get some extra space in your views in Resco Mobile CRM. Below is an example of using extra space in the view where I have added custom icons in place of the commands.
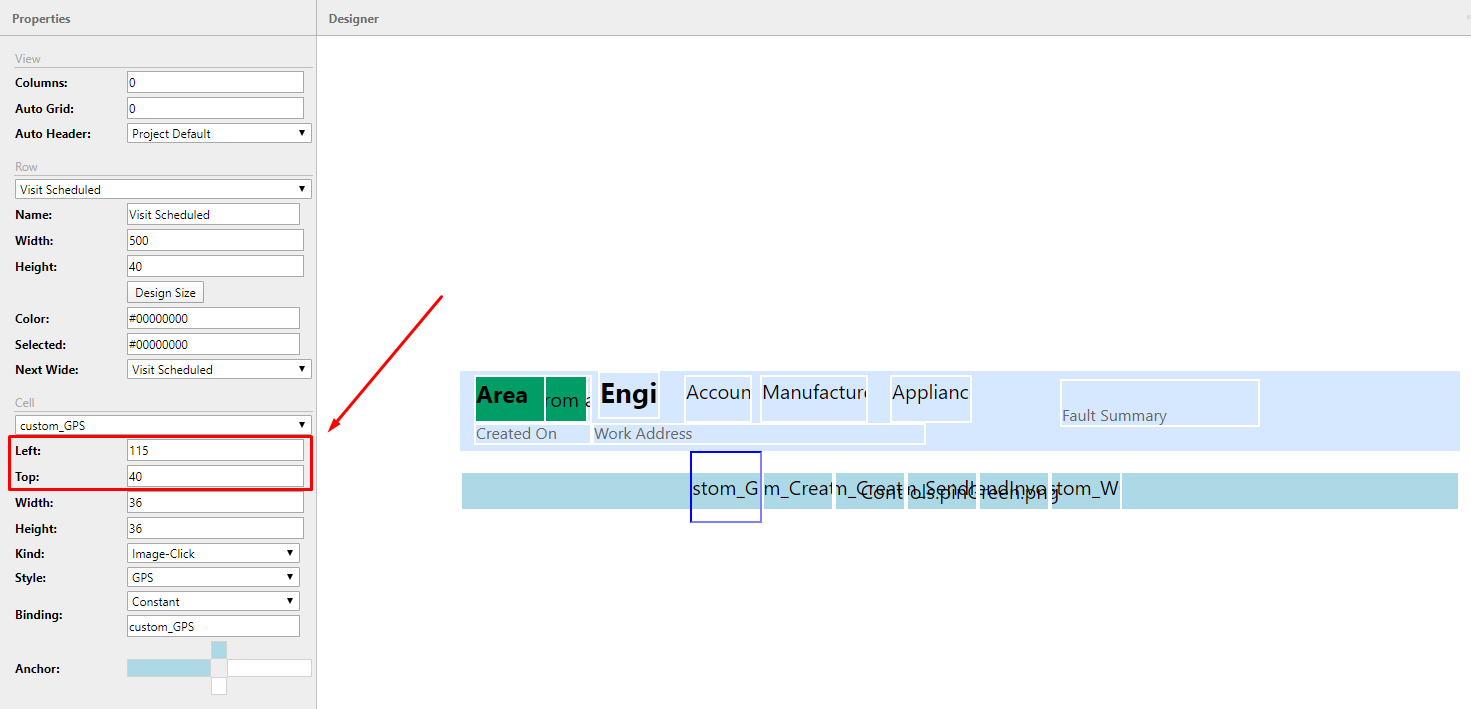
To use this extra space you need place your items underneath the main view area provided to you. I have added a map pin image here so I can see the components I place in the bottom part of the view.

The area is highlighted in red.

To add a new component you cant simply drag and drop it under the view. It will prevent you from doing so.

What you need to do is place the component in the main view first and then use the location values to move it below without Woodford removing it.
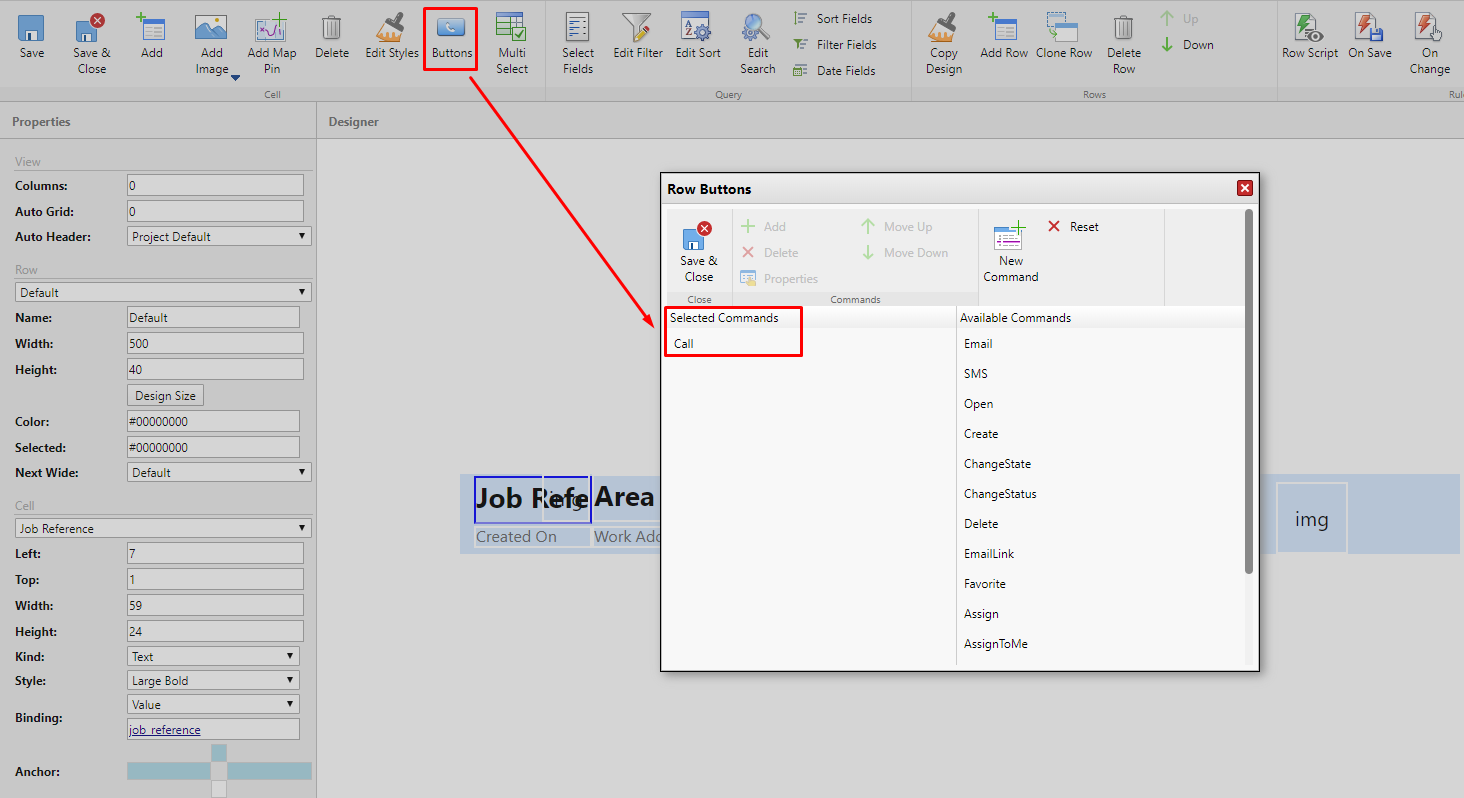
To activate this extra view space, we need to add a button to the view. In this case we are going to add the ‘Call’ button, this will cause the view to expand when we click the view in Resco.
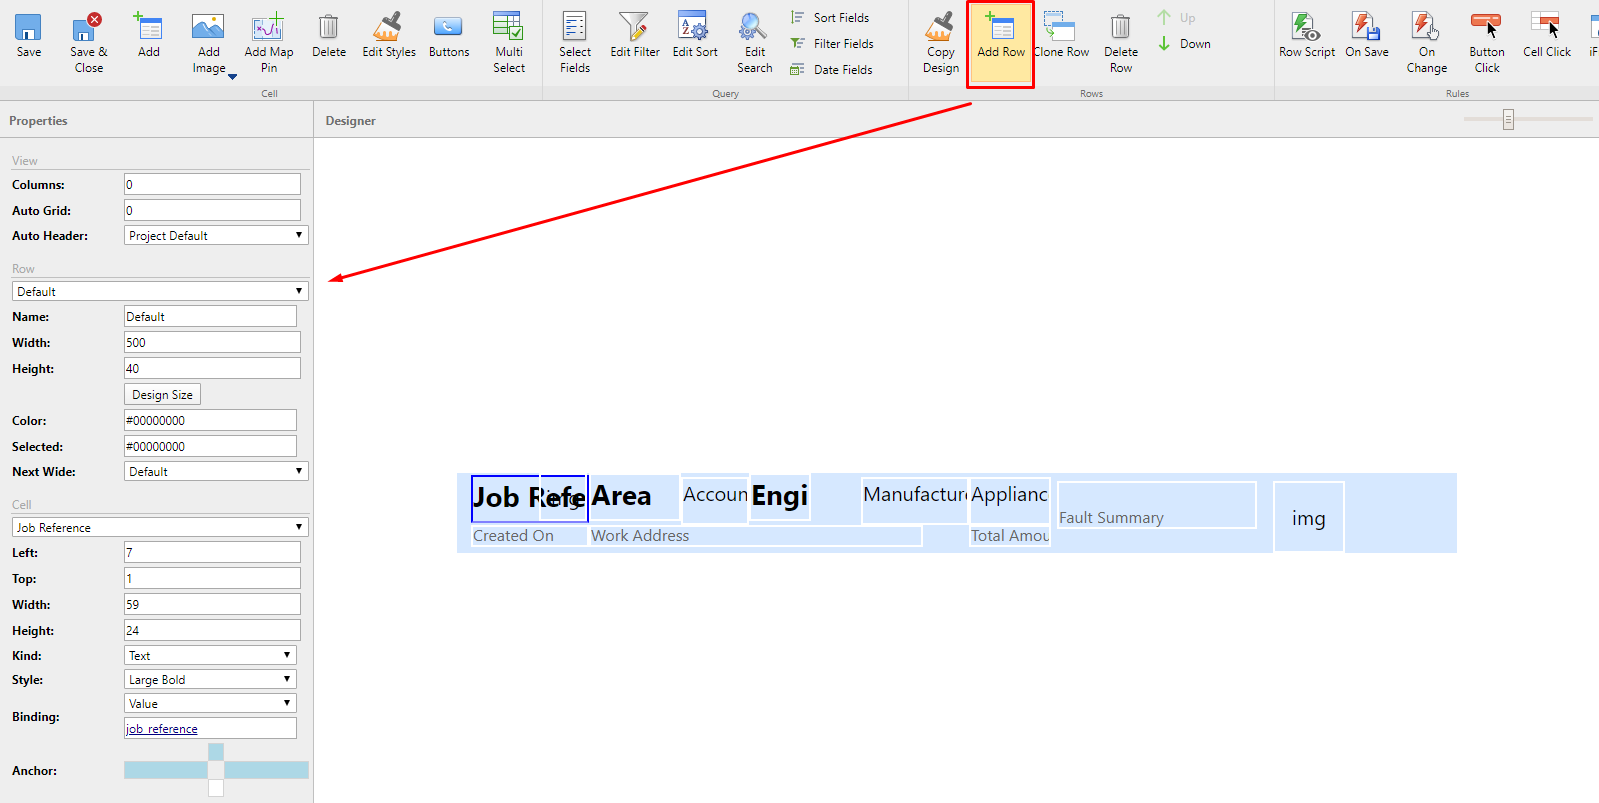
But what if we dont want the ‘Call’ button visible in the view? In this case we need to add an extra row to the view. I have called it ‘Default’ and I will be adding the ‘Call’ button here but I will never display this row to the user. Doing this will force the expansion of all of the other rows in the view without actually having the ‘Call’ button visible on the other rows.
To ensure that this row is not loaded you will need to edit the row script to hide/show the rows so the ‘Default’ row is never shown.

After doing these steps you will see those extra items when you expand the view.