Microsoft have added an official article on how to upgrade your mobile project https://docs.microsoft.com/en-us/dynamics365/field-service/mobile-upgrade-project.
You have 2 options:
- Import the new project template from Microsoft, derive the template and create a child project, and manually recreate your customizations in the derived child.
- Use GitHub to understand the difference between the new project template and your customized project template and copy and paste the changes.
Below explains how to upgrade following the 1st option. However if you are interested in using GitHub to upgrade then please follow the Microsoft article I linked above.
1. Import the latest Woodford project from Microsoft
The first step is to download the latest Woodford project from Microsoft and also creating a new blank project for your customisation’s. You will need to derive your personal project so that its a child of the Microsoft project. You can see the steps here –
https://docs.microsoft.com/en-us/dynamics365/customer-engagement/field-service/install-field-service#import-the-mobile-project-template
2. Copy your old Format 1 (Packed) project to version 2
The second step is needed if you were still using the old Silverlight Woodford configurator and if you project format is still format 1, if not then you can skip this part.
If so you will need to create a new Woodford project and import your old project file into a new temp project and open it in the new HTML5 configurator (This will change the format to format 2). This is so you can export form and view XML’s from each entity and later you will import them into your new 11+ project. (This functionality does not exist in the Sliverlight version).


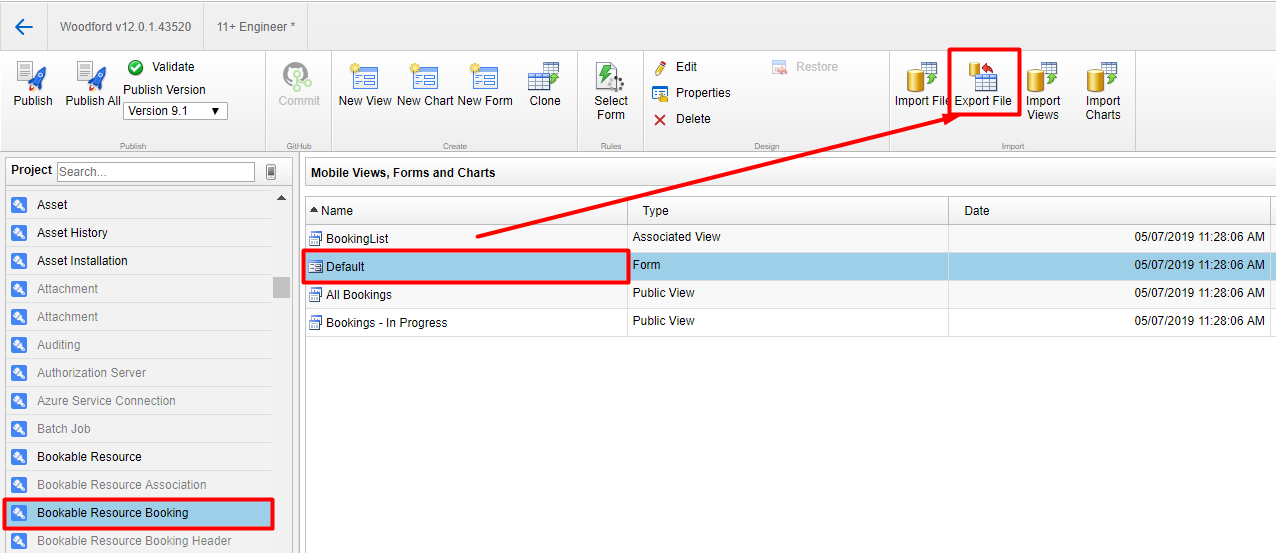
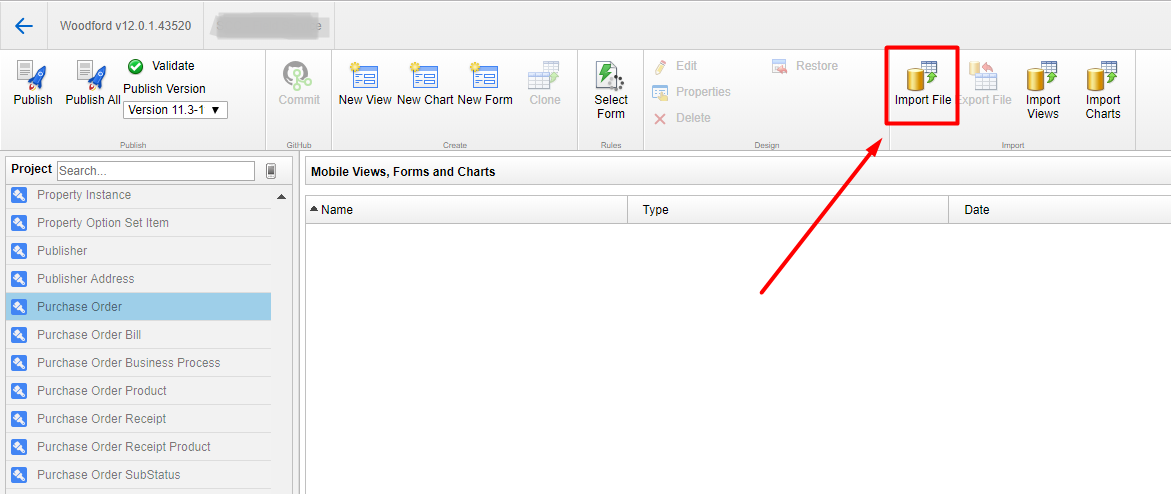
3. Export Form and View XML
The third step is to manually export each of the forms and views from your old project. Make sure you are using the HTML5 version to do this as the Silverlight version cannot do this. The XML includes everything that was contained in the form or view, including the form layout, form rules and more.
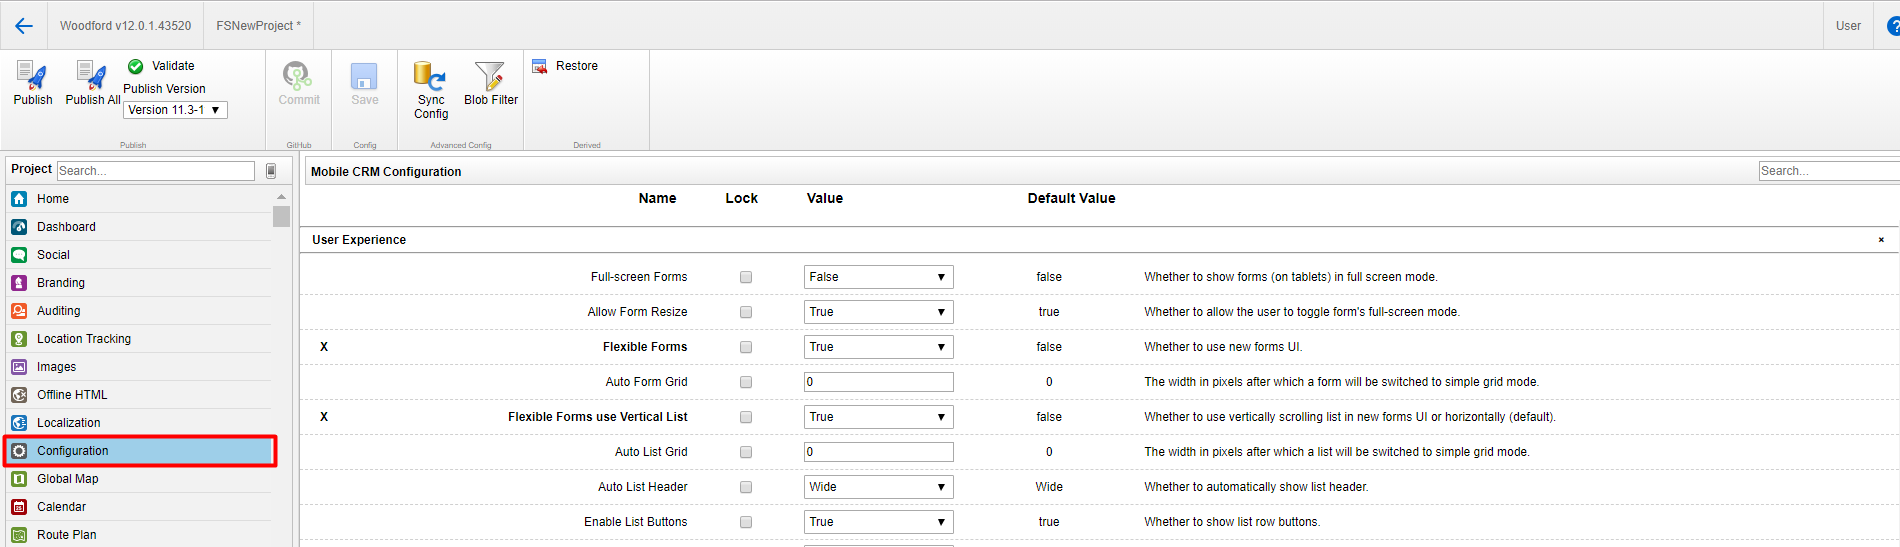
4. Copy configuration from your old project to your new project
The fourth step is to manually set your configuration rules into your new project.
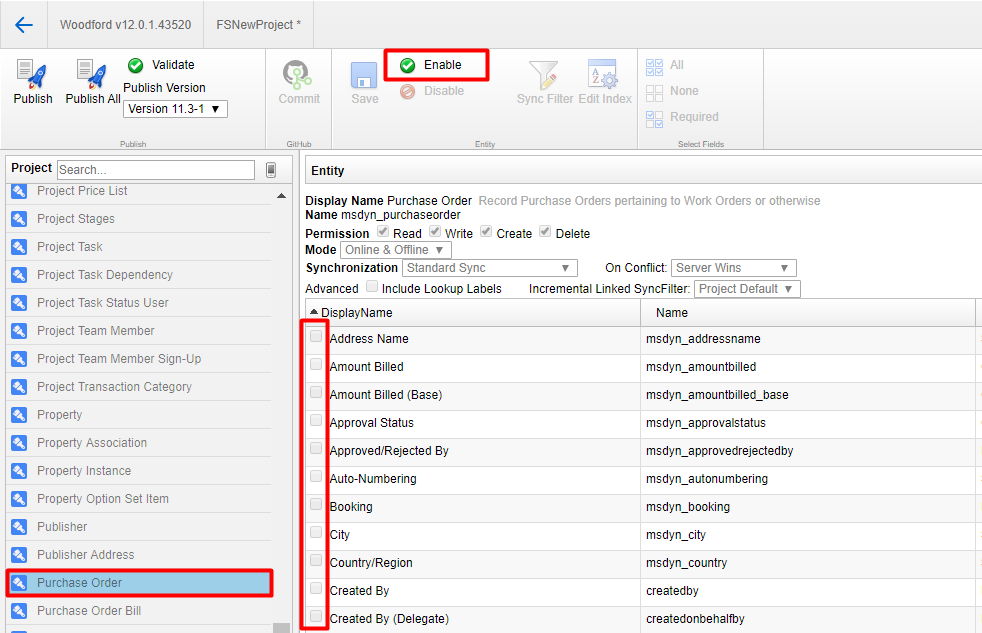
5. Enable entities and fields
The fifth step is to enable each entity and field you need, this is another manual step.
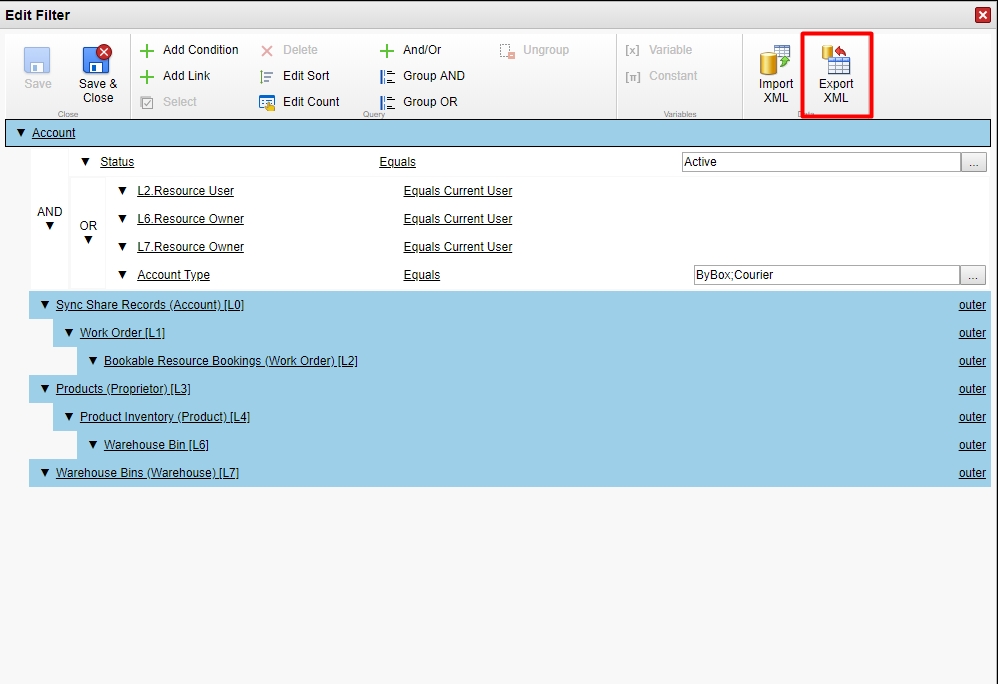
6. Import Sync Filters
The sixth step is to export the sync filters from your old project to your new project. The reason why this is the sixth step is because you need to enable fields and entities so the sync filters can import correctly.
7. Import Forms and Views
The seventh step is to import the Forms and Views which you exported from your old project.
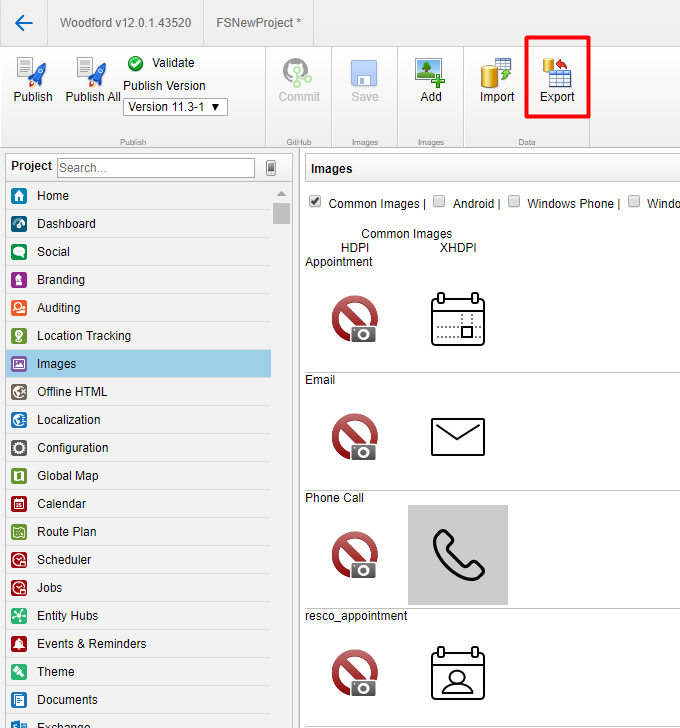
8. Import Images
The eighth step is to export the images from your old project to your new project. This is if you have added your own images in your old project.
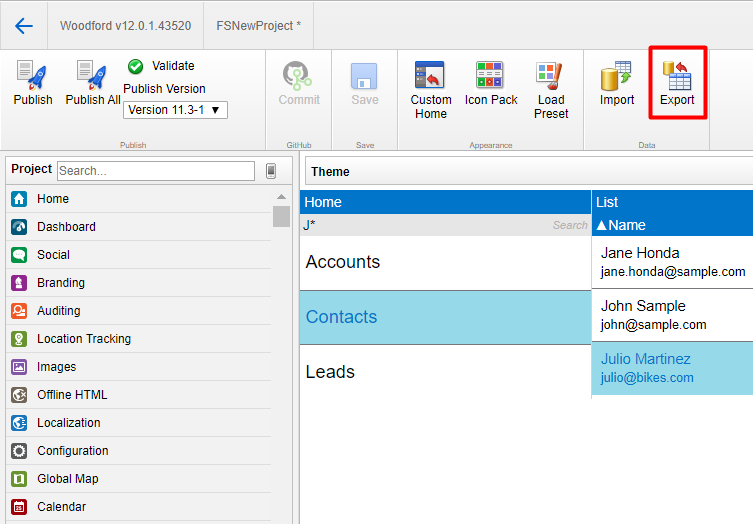
9. Import Theme
The ninth step is to export the Theme from your old project to your new project. This is if you have added your own theme in your old project.
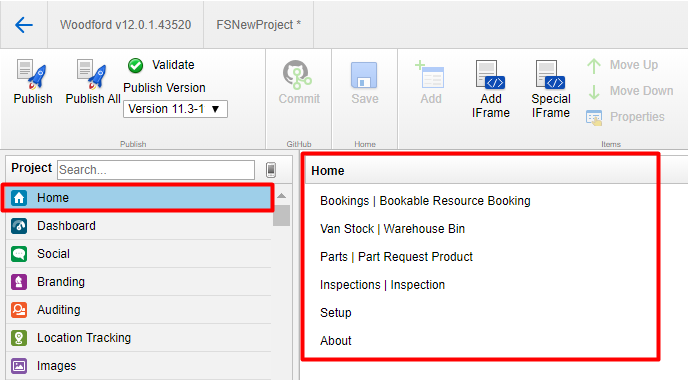
10. Update the Home properties
The tenth step is manually construct your Home layout. Once you have added the entities you then need to update the default views which are related to those entities on your home page.
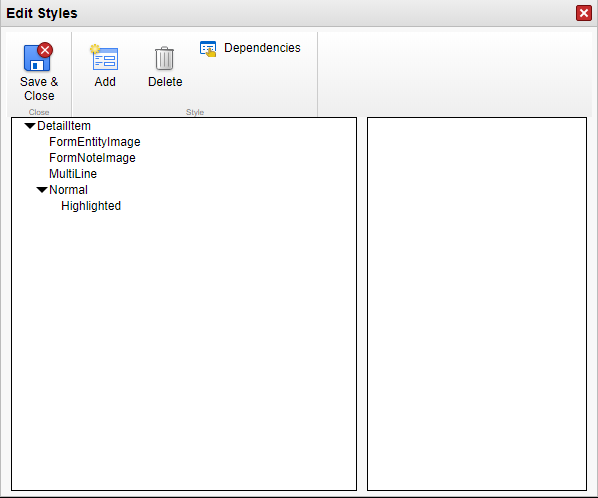
11. Update Style templates
The eleventh step is to manually add the style templates to your new project. This is if you have added custom styles in your old project.
12. Add Offline HTML files
The twelfth step is to manually add any offline html files to your new project. This is if you have added custom offline html files in your old project.
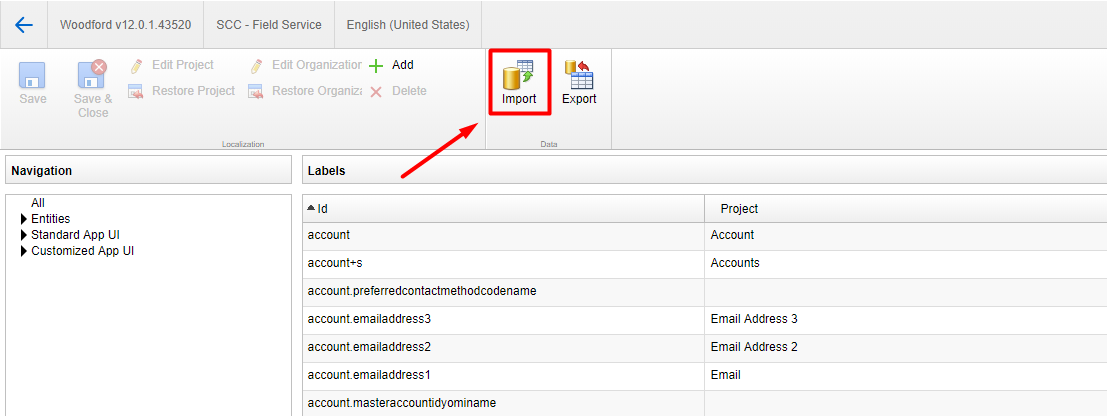
13. Import Localisations
The thirteenth step is to import the localisations file to your new project. This is if you have added updated the localisations files in your old project.
14. Debug any form rule errors
The last step is to test and debug any unforeseen changes that may occur when you did the upgrade. In my experience I needed to update some of my form rules as they ere acting differently once I did the upgrade.
“I don’t have time to manually upgrade, I need it NOW!”
If you don’t have time to do this upgrade manually. You can download the latest version of the Microsoft Woodford project and copy the Telemetry.js file within the Offline HTML, you can then import it into your current Woodford project and you should be able to use the new Field Service Mobile application. Although I don’t think its the best way to do the upgrade as you may be missing certain components provided by Microsoft.
Thanks sharing a nice article.